Thursday, August 10, 2023

Sweet Corn and Zucchini Pasta


Sweet Corn and Zucchini Pasta

by Jami Floyd


Everything but the kitchen sink! Use six items from your CSA box.


Ingredients

1 Small Red Onion

2 T. Butter

1 T. Olive Oil

1 Clove Garlic

1 Jalapeno

2 Medium Zucchini

4 Ears Corn

1 Pound Rigatoni

Salt

Pepper

Chives


Step 1. 

Bring large pot of salted water to boil.


Step 2.

While waiting for the water to boil. Cut zucchini into 1/2-inch cubes.  Place in colander and salt with 1 teaspoon salt.  Allow to sit and drain for 15 minutes.


Step 3.

Cut corn off the cobs into a large bowl.  Scrape the cobs with the back of a large chef’s knife into the bowl.  


Step 4. 

Preheat 12 inch skillet on medium heat.  Add butter and olive oil.


Step 5.

Add pasta and cook until al dente.


Step 6.


Cut the onion in half and slice thinly.  Finely dice jalapeño and garlic.


Step 7.


Saute onion and jalapeño until soft (about 4 minutes).  Then add garlic and cook for one minute.


Step 8.


Add salted, drained zucchini to skillet and cook on medium until just beginning to soften.  Add salt and pepper to taste.


Step 9.


Add corn to skillet, raise the temperature to medium high, and cook until corn just begins to caramelize at the edges of the pan.  Add 1/2 cup pasta water to skillet and deglaze the pan.


Step 10.


Drain pasta and add to the large bowl that you used to cut the corn.


Step 11.


Pour sautéed vegetables from skillet into the bowl and mix.


Step 12.


Sprinkle 2 T. chopped chives over bowl and serve with grated romano cheese.


Helpful tips: Be sure to scrape all of the milk from the corn cobs after removing the corn.

Wednesday, August 2, 2023

Summer Bounty Skillet Pasta


jammy squash, burst tomatoes, and corn make noodles summer ready!

Ingredients:

2 summer squash
1 ear of corn, cooked
handful of cherry tomatoes (depends how many you have left, I can never resist diving in first thing when I pickup my box)
1/2 box of pasta (can scale up to feed a crowd!)
paprika (optional)
dash of olive oil

salt & pepper


Let's get saucy! 

  1. PREP YOUR VEG: halve the summer squash and thinly slice, halve tomatoes, cut corn off of cob
  2. SIZZLE TIME:  heat a dash of olive oil in a large skillet over medium and add summer squash, season with salt, pepper and optional paprika to taste. Continue to cook just the summer squash until softened and jammy (approx: 25 mins )
  3. MEANWHILE: fill medium pot with water, season with salt and set to boil for cooking the pasta
  4. DOUBLE TIME: When the pasta water comes to a boil and the zucchini is softened and jammy add pasta to water and cook according to package directions, reserving 1/2 cup of pasta water and draining the pasta when al dente. At the same time, add cherry tomatoes and corn to summer squash sauce.
  5. ALL TOGETHER NOW: add pasta to sauce and stir to combine using reserved pasta water to thin sauce as needed
  6. SERVE AND ENJOY!

Helpful tips and tricks: Cooking your corn in a pot of boiling water? Stop right there! Don't drain it. Corn cooking water can be enjoyed as a beverage hot or cold! I picked up this tip from a dear cycling friend who loves to use it instead of traditional electrolyte drinks. Give it a try!

Thursday, July 27, 2023

Recipe of Week 6: Braised Cabbage with Tzatziki


Recipe of the Week: Braised Cabbage with Tzatziki

CALLS FOR CABBAGE, CUCUMBER, YOGURT, GARLIC, SPRING ONION!
BRAISED CABBAGE - 5 minute prep, 2 hr, 15 minutes cook time

1 Napa cabbage, core intact, halved, then quartered (8 pieces)
1 cup spring onion, chopped
1/3 cup chicken broth
2 tsp lemon juice or apple cider vinegar
2 tsp extra virgin olive oil
za'atar seasoning, salt, pepper to taste

2 tbsp honey

TZATZIKI - 5 minute prep
1.5 cup of strained greek yogurt
1 cucumber, skin on, grated
1 tsp lemon juice
4 springs dill, chopped
1 clove garlic, finely chopped

 
GARNISH
handful green spring onion, chopped

1 jalapeño pepper, sliced, seeds removed


SALAD: 

  1. PREPARATION: Set oven to 325F. Place 1/8 cabbage pieces in oven safe dish, sprinkling spring onion on and around cabbage. Do not crowd the pan or dish!
  2. SEASON:  Pour chicken broth and lemon juice around cabbage. Drizzle extra virgin olive oil over cabbage, seasoning with salt, pepper, and Za'atar according to taste.
  3. BRAISING: Cover dish(es) with aluminum foil and place in oven for 1 hr. After, remove from oven and lightly flip cabbage 8ths, being careful not to break apart pieces. Cover with foil, and return to oven for 1 more hr. 
  4. BROIL: Remove cabbage from oven. Turn on broiler. As the broiler heats up, remove the foil and drizzle honey onto cabbage, making sure to coat evenly. Put cabbage in broiler for 5-15 minutes, keeping a close eye on charring! Cabbage should be charred and slightly sweet!

TZATZIKI: 

  1. PREPARATION: While the cabbage is braising, grate cucumber, with skin on. Finely chop garlic. Squeeze liquid from cucumber using a cheese cloth or heavy duty paper towel. This will allow the tzatziki remain thick, rather than watered down.
  2. COMBINE: Mix in yogurt, cucumber, garlic, and dill! Squeeze in some lemon juice, season with salt, add sprigs of dill, and enjoy!
Plate Tzatziki beneath braised cabbage, garnishing with fresh greens and herbs!

Helpful tips: Using the spring onion tops as a scallion replacement this week to avoid waste!

 
About Sophia
Thanks for cooking along! I am an UWS lover of food, artist, and educator! I have a deep love for food science and leaving no trace, which I hope reflects in my recipes :). 

Thursday, July 20, 2023

Week 5: Pickled Kohlrabi and the Kitchen Sink Salad


Recipe for Week 5: Pickled Kohlrabi and the Kitchen Sink Salad

SWEETGREEN, MOVE OVER! DOUBLE THIS RECIPE TO ALLOW FOR BULK PREP

*the prep time is minimal, however, please allow at least 2 hours for kohlrabi to pickle. To reduce prep time, just throw in the kohlrabi matchsticks sans pickling!
** lightly salting your prepped veggies will bring out their natural flavors!
 

FOR SALAD

1 Napa cabbage, thinly chopped, core removed
3 carrots, grated
1 cucumber, skin peeled, diced

3 scallions, chopped
1 bunch green beans, lightly blanched, cooled and chopped
1/4 cup cilantro leaves, chopped
1 large kohlrabi, cut into matchsticks (set aside for pickling if desired)
*1 Hungarian pepper, seeds removed, thinly chopped (set aside for pickling)
*1/2 bunch chives, chopped (set aside for pickling)


FOR DRESSING
1/2 cup canola oil
1/4 cup warm water (needed to breakdown miso)
2 tbsp rice vinegar
2 tbsp soy sauce
2 tbsp sesame oil
2 tbsp miso paste

1 tbsp grated ginger
1 tsp peppercorn

 
*FOR PICKLING LIQUID
1 cup water
1 cup rice wine vinegar
1 tbsp honey
1 tbsp sesame oil
1 tbsp kosher salt
1 grated garlic clove
1 tsp peppercorn

SALAD: 

  1. PREPARATION: Wash and chop vegetables accordingly! Match sticking the kohlrabi will required a sharp knife and patience. Lightly sprinkle kosher salt on chopped vegetables to increase flavor.
  2. EXTRAS: I added some extra edamame and peanuts I had lying around!
  3. DRESSING: Combine all ingredients in a mason jar and shake! or in a bowl and whisk! The dressing measurements are for bulk preparation and can be saved in the fridge for 3 weeks!
  4. ENJOY: Toss veggies, cabbage, salad dressing, and serve! If you're choosing to quick pickle the kohlrabi, wait 1.5 to 2 hours, remove a handful of matchsticks from pickling liquid and enjoy! (be careful not to plate any peppercorns)

PICKLED KOHLRABI:


Pickled matchsticks will remain fresh for 1 week in the fridge
 
  1. PREPARATION: Place matchsticks in large mason jar. Bring water, vinegar, salt, honey (or sugar) to boil.
  2. FLAVOR: Add chopped peppers, peppercorns, grated garlic and Chinese chives to mason jar.
  3. COMBINE: Pour pickling liquid over matchsticks and wait at least 2 hours before plating.

Helpful tips: Please use a mason or jam jar for pickling process. Pouring boiled water in standard glasses will cause Tupperware to shatter. This pickled slaw pairs well with grilled meats and rice!


NEED HELP USING UP YOUR HERBS?
Wrap them at the stem, hang on a hook, and after one week, you'll have a diy herb pantry. 
Up-cycle an old jar and use it for storage!

Wednesday, July 12, 2023

Sour Cherry Pie


SOUR CHERRY PIE 


Who says you can't make pie on a weeknight?
This simple pie is low on effort and big on flavor!


INGREDIENTS:
pie crust (or make your own)
1 quart sour cherries
3/4 cup granulated sugar + a little for sprinkling
1/4 cup cornstarch
zest of one lemon
pinch of salt
2 ish tablespoons butter
1 egg


LET'S MAKE A PIE!

  1. PREHEAT the oven to 375
  2. PREP THE CHERRIES: This was arguably the most arduous part of my pie making. If you have a cherry pitter, break it out! If, like me, you don't ... grab a small knife, a good podcast, and pop those pits out. It's worth the effort in the end!
  3. MAKE THE FILLING: Combine pitted cherries, 3/4 cup sugar, 1/4 cup cornstarch, pinch of salt, and the zest of one lemon in a bowl. Give a good mix to combine well. If you feel compelled to add other seasonings to your filling - I support you! A little vanilla, some warm spices, who knows what you might discover! Once mixed, pop that filling in the fridge. 
  4. PREP YOUR CRUST: I do on occasion (Thanksgiving) like to make my own pie crust, but for weeknight pie, an easier route can be just as rewarding. If you want to make your own, go for it! If you, like me, opt to buy a frozen crust, just be sure to sit it out on the counter to thaw. Shouldn't take more than a few minutes in these scorching summer temps. We'll use one half of the crust to line the pie plate and then the other for the top of the pie.
  5. ASSEMBLY: Once the pie plate is lined, grab your filling and pop it into the pie plate on top of your bottom crust. We'll dollop a few dabs of butter on top of the fruit filling. Time for the top crust! I made a lattice by simply cutting the other crust into strips and weaving them over top of my pie. You could also simply put the top crust on top and cut an air hole. You could really get creative here and cut out some cool shapes, or keep it simple.
  6. ASSEMBLY PART 2: Once fully assembled whisk up your single egg and brush it over the exposed top crust. Sprinkle a bit of granulated sugar on top of egg wash.
  7. FREEZE: Pop the assembled pie in the freezer for 15-20mins to chill before baking
  8. BAKE: It's time! Pop that pie in the oven on top of a baking sheet. As you can see from my photos, mine got a bit explosive so this just eases your clean up. I baked my pie about 1hr 15mins, yours may need a bit more or a bit less than mine so keep an eye on it.
  9. CHILL AND ENJOY: When its done, let the pie cool a bit (always the hardest part of baking for me) slice and enjoy. This would be awesome with a little whipped cream or vanilla ice cream.

TIPS AND TRICKS:
Didn't use your entire egg for egg washing the pie? No need to waste it! Scramble it up for a quick dinner while you await dessert.

Wednesday, June 28, 2023

Recipe for Week 3: Roasted Rainbow Carrots with Chimichurri Sauce


Recipe of the Week: Roasted Rainbow Carrots with Chimichurri Sauce

FRONDS TO ROOTS: ROASTED RAINBOW CARROTS WITH CHIMICHURRI SAUCE

*the chimichurri sauce was prepared in bulk to be used throughout the week. This sauce can be stored in the refrigerator for 1-2 weeks or frozen*
 
**carrots will be parboiled before roasting. Parboiling softens root vegetables from the inside out, allowing the carrots to remain moist and plump during roasting process, which cooks from the outside in.
 

FOR CARROTS
1 bunch Carrots Halved (stems removed, set aside)
2 tbsp Salt (for water in parboiling step)
3 tbsp Olive Oil
2 tbsp Honey
1 tsp Zaatar (or more to taste)
Salt and Pepper (to taste)
 
FOR CHIMICHURRI (bulk prep)
1 cup tightly packed Carrot fonds (leaves removed from stems)
1 cup tightly packed Parsley
1/3 cup tightly packed Oregano
1 Garlic scape 
3 Garlic cloves
1 cup Extra Virgin Olive Oil
¼ cup Red Wine Vinegar
1 tsp. Red Chili Flakes
1 tsp. Salt and Pepper (to taste)

HONEY ROASTED CARROTS: 

  1. PREPARATION: Set oven to 425F. Oil sheet pan(s) until shiny and place in oven to warm. Remove stems from carrots and set fronds aside. 
  2. PARBOILING: Halve carrots and place in pot of heavily salted water. Let water and carrots come to a boil and reduce to a simmer, letting carrots bathe for 5 minutes; until just barely tender or al dente.
  3. SEASONING: Strain carrots. In a bowl, on plastic cutting, or plate, coat both sides of carrots in olive oil and honey. Lay flat and season both sides with zaatar seasoning (or cumin), salt, and pepper.
  4. ROASTING: Remove baking sheets and place carrots halved side down far apart. Space between pieces allows for the carrot to roast instead of steam. Roast for 15 minutes (begin chimichurri). Flip carrots skin side down and roast for an additional 10 minutes.
  5. ENJOY: Plate carrots halved-side down and drizzle chimichurri on top. Plate with sour cream if available!

CHIMICHURRI SAUCE:


Every culture has an herb sauce! Argentina and Uruguay are known for chimichurri, a sour-spicy herb sauce used alongside grilled meats, vegetables, and eggs. Carrot fonds and parsley can be interchanged for this recipe. I used 1 ½ c carrot fronds and ½ c parsley
 
  1. PREPARTION: Remove carrot fond leaves from stems and wash, using a salad spinner or paper towel to dry.  Remove parsley leaves from stems “      “. Remove oregano leaves from stems “         “. Wash Garlic scape. Peel garlic cloves.
  2. CHOP: Finely chop all herbs and garlic (I do this separately, but it’s not a must).
  3. COMBINE: Mix all herbs together in a large bowl. Slowly add extra virgin olive oil and red wine vinegar. Season with red chili flakes salt and pepper as you combine. Oil and vinegar should lightly cover the herb mixture. Sauce should taste spicy, herbaceous, and sour!

Helpful tips: Use your own judgement when seasoning and glazing! Salt is a culinary catalyst that allows flavor to emerge and balance! 

 
About Sophia
Thanks for cooking along! I am an UWS lover of food, artist, and educator! I have a deep love for food science and leaving no trace, which I hope reflects in my recipes :). 
 

As always, please visit our blog for recipes over the past dozen years, and send us your recipes if you find something that you really love and that utilizes our current distribution.


Instagram

Facebook

Website

Click here if you have a recipe to share!
NEED HELP USING UP YOUR HERBS?
Try making a simple syrup!
Simple syrups can brighten and sweeten lemonade, iced tea, iced coffee, or cocktails!

Mix equal parts water (1 cup) and sugar (1 cup)  (measured separately). Bring to a boil until sugar dissolves. Remove from heat. Add 1/3 cup herbs of your choice and steep for 30 minutes to 1 hour. Strain herbs and refrigerate!

Herb tip: "Clap" herbs between your hands in order to release their oils, also known as "expressing" the herb. Herbs that benefit from expressing include mint, sage, rosemary, and lavender. 

Thursday, June 22, 2023

Potato Gnocchi with Carrot Top & Basil Pesto


Potato Gnocchi with Carrot Top & Basil Pesto

by Joelle F. Floyd & Kurt Flehinger


Looking for a tasty way to use up your WHOLE carrots plus some potatoes, too? Try making Potato Gnocchi with Carrot Top & Basil Pesto! 


Ingredients

For the gnocchi:

2 lbs Yukon gold potatoes

1 cup all-purpose flour

1 tsp extra virgin olive oil

1 egg yolk


For the pesto:


1 cup carrot tops

2 cups fresh basil

1/3 cup walnuts or pine nuts

1 clove garlic

1/4 cup parmesan cheese

Olive oil


Step 1. 

Preheat oven to 400 degrees. Prick the potatoes all over with a fork. Place them on a baking sheet and bake until fork-tender, about one hour. Remove from oven and halve potatoes to cool. As soon as they are cool to the touch, scoop the meat of the potatoes into a potato ricer. Rice the potatoes onto a paper towel or other thin surface to cool completely. 


Step 2.

Once cooled, place the mound of potatoes on a large surface and sprinkle flour over the top. Make a well in the potato-flour mixture and place the egg yolk in the center of the well. Using your hands, gently bring the flour, egg, and potato into a dough. (But be careful to not knead it like bread dough; that will make it tough.)


Step 3.

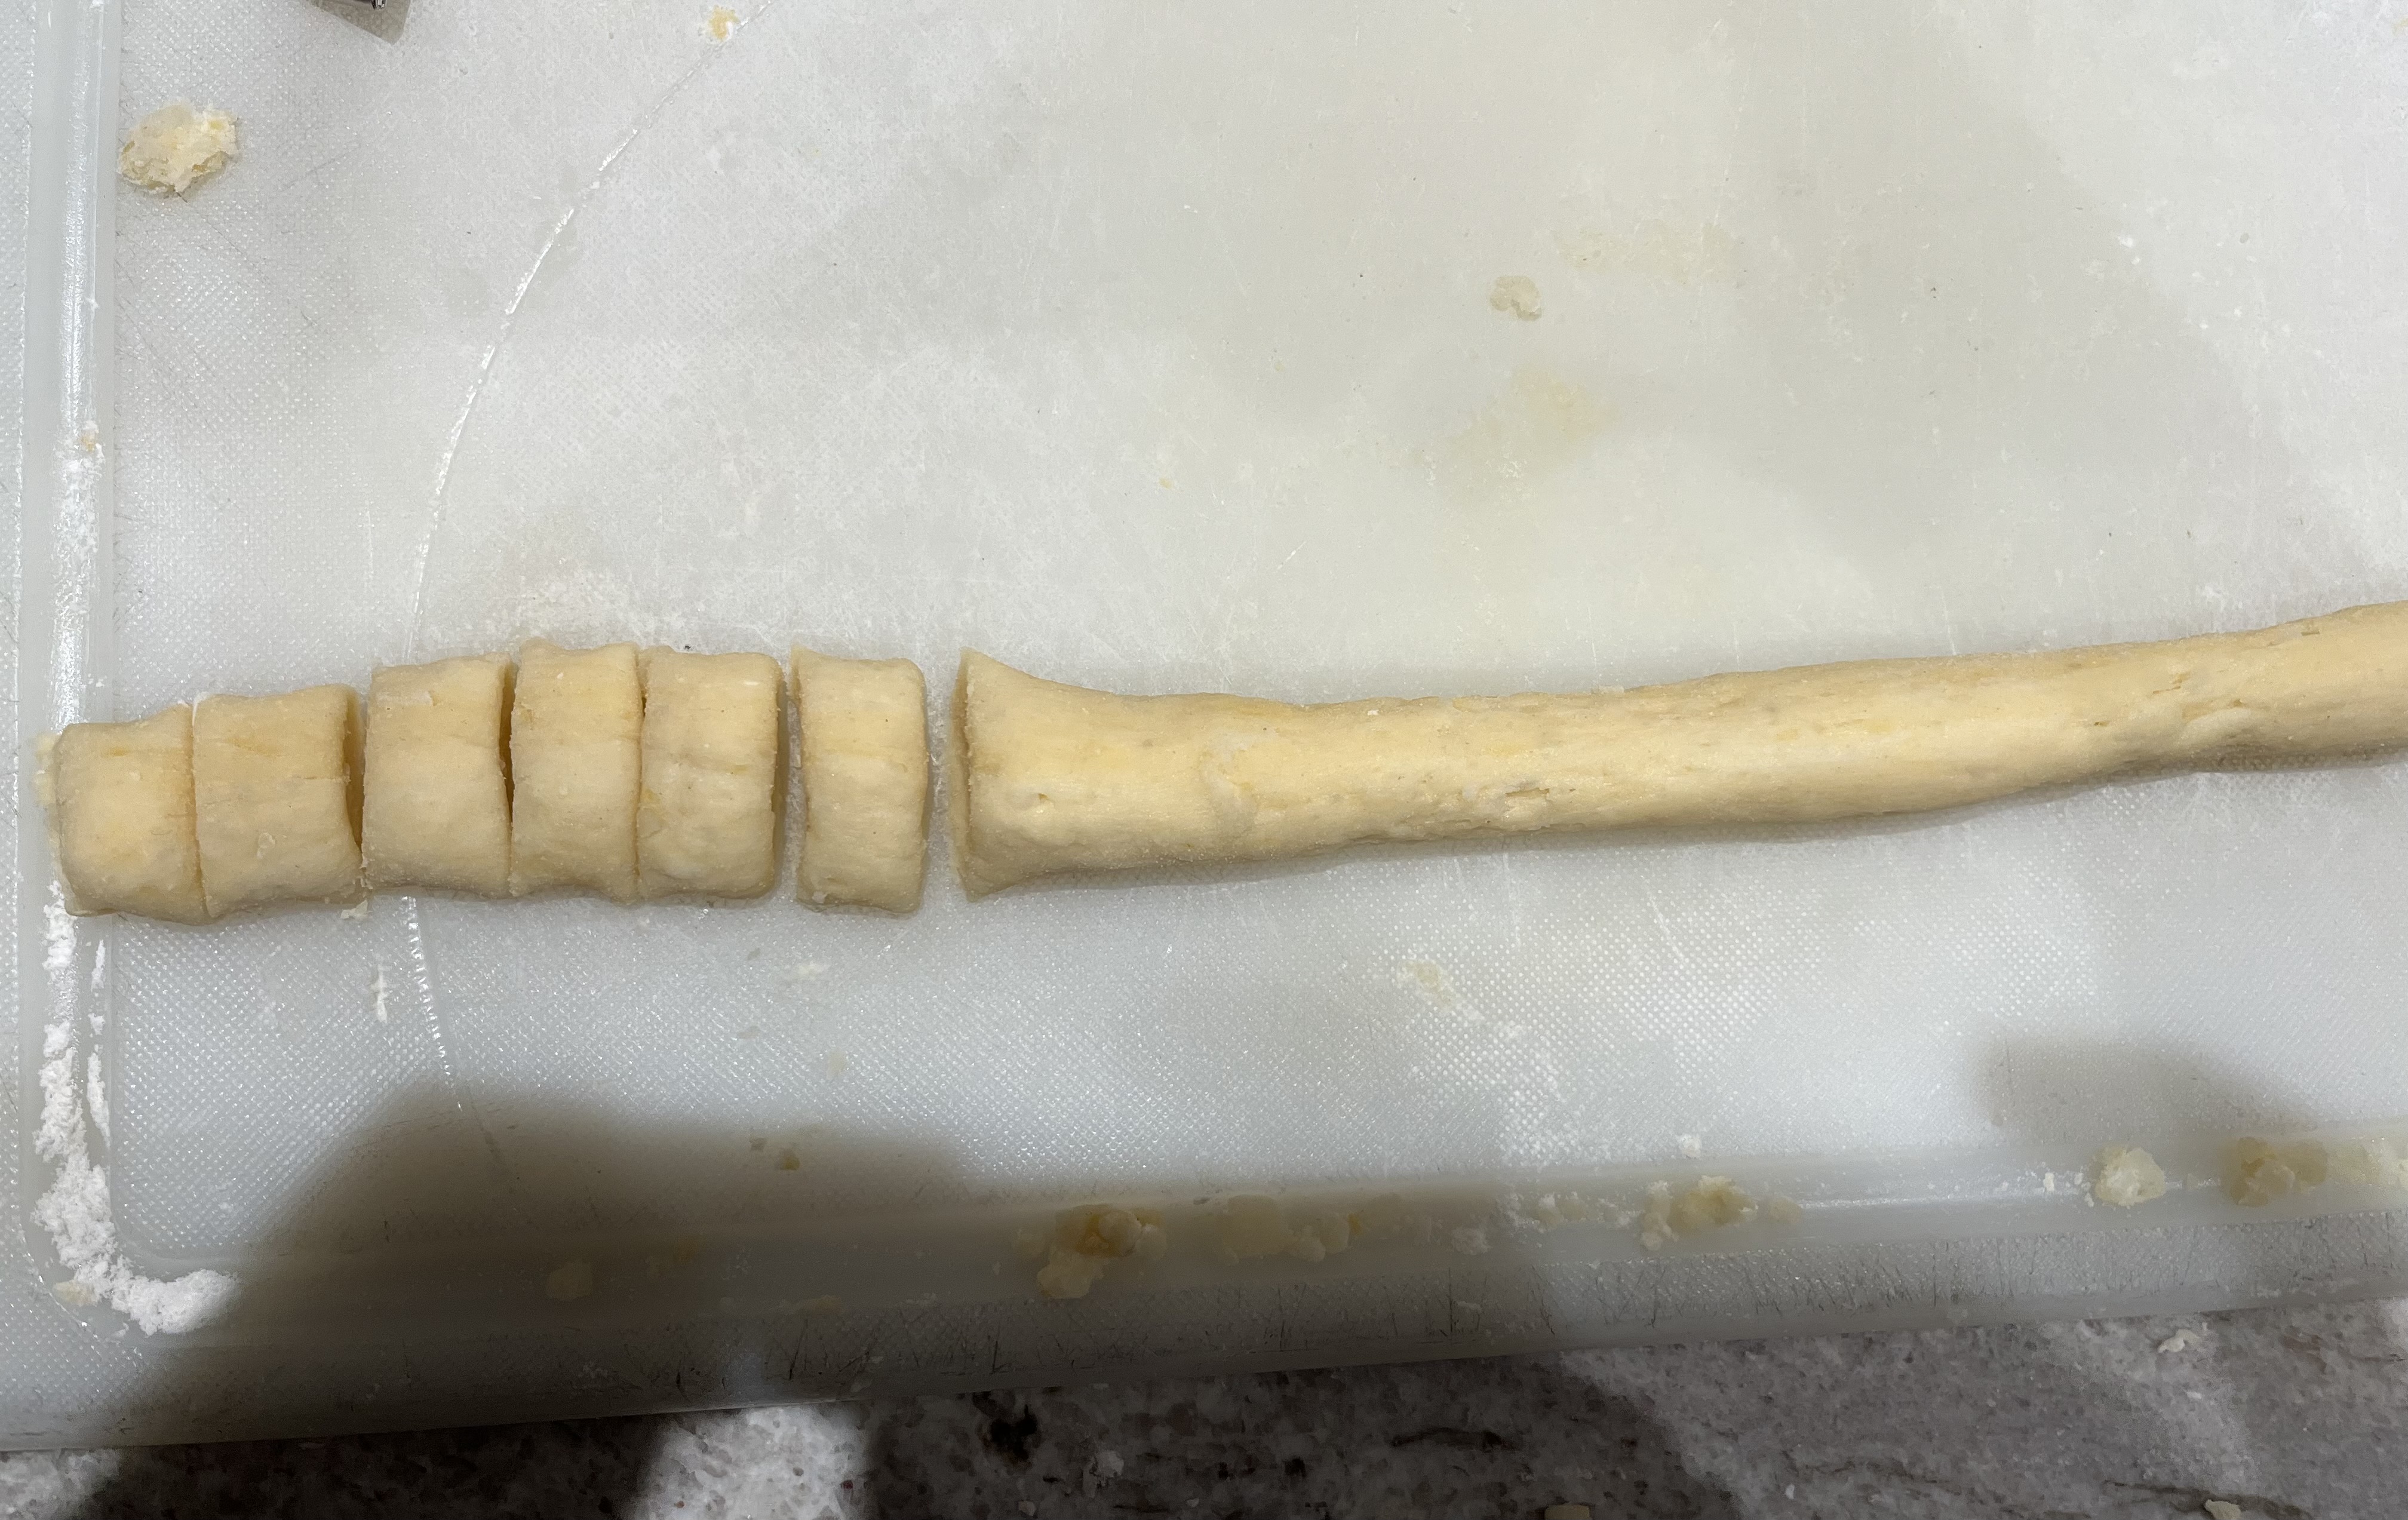
Divide the dough into six sections. Create a rope 1/2 inch in diameter and cut into 1/2 inch segments. Roll each piece against the tines of a fork to create ridges (this allows the sauce to better cling to the gnocchi). Repeat with each section. 


Place the gnocchi in a single layer on a cookie sheet and allow to dry for at least one hour. 


Step 4. 

While the gnocchi is drying, add carrot tops, basil, garlic, and nuts to a blender or bowl of a food processor and process until finely chopped. Mix in the parmesan cheese, processing for another 30 seconds. Drizzle in olive oil until pesto reaches desired consistency. (Don't worry if your pesto is too thick! You can add a bit of reserved pasta water, later.) 

Scoop pesto into a medium-sized bowl.

Step 5.

Bring a pot of salted water to a boil. Add gnocchi and cook until it floats (about 4 minutes). Remove from water with a slotted spoon. Add the gnocchi to the bowl with the pesto. Gently mix and serve immediately. 


Helpful tips: We used 3/4 of the recipe for our gnocchi, reserving the rest for future snacking on crackers, bread, etc. We also roasted the carrots with some olive oil and thyme for a tasty side dish.